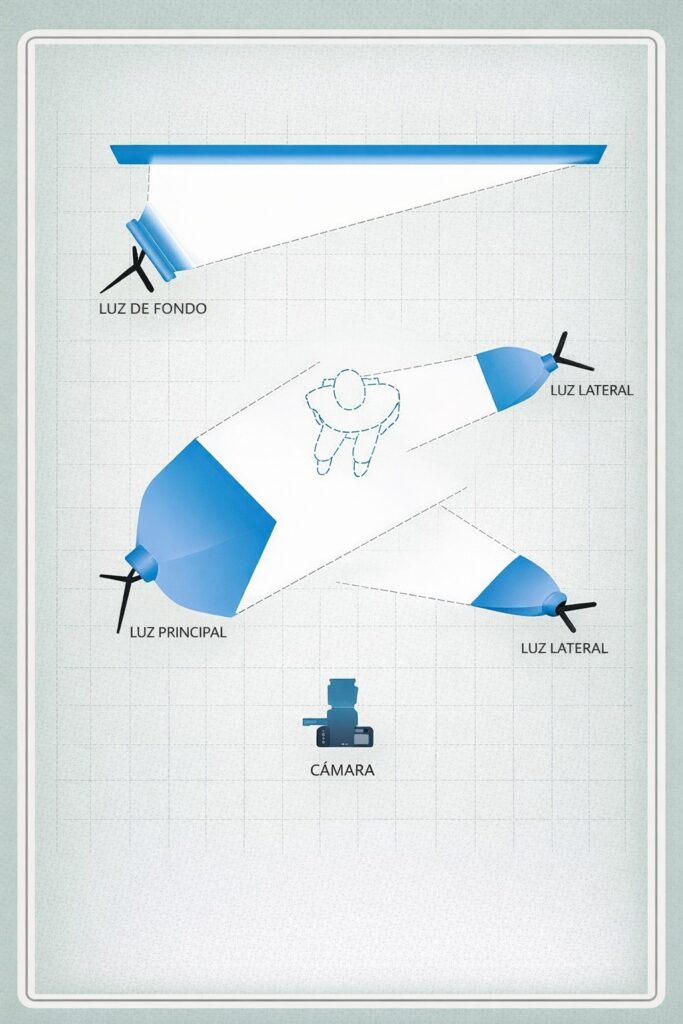
This diagram shows how to position lights correctly to achieve a balanced, professional image with visual depth 📸✨
🌟 1. Key Light
This is the most important light source.
-
🎯 Illuminates the face or subject directly.
-
🧭 Placed in front, slightly to one side.
-
🌗 Defines the shape, volume, and details of the subject.
👉 It is the foundation of all professional lighting.
🌤️ 2. Fill Lights
Their function is to soften shadows.
-
⚖️ Balance the lighting created by the key light.
-
🌫️ Reduce harsh shadows on the face or body.
-
🎬 Create a more natural and pleasant look.
👉 Without fill light, the image appears very high-contrast.
✨ 3. Back Light
Placed behind the subject.
-
🌟 Separates the subject from the background.
-
🎨 Creates a professional depth effect.
-
👤 Generates an elegant light outline.
👉 This effect makes the video look more cinematic.
📷 4. Camera Position
The camera is placed in front of the subject.
-
🎯 Captures balanced lighting.
-
👁️ Shows the properly lit final result.
-
🎬 Allows full use of all lights.
🧠 Final Result of This Setup
✔️ Professional image
✔️ Soft shadows
✔️ Greater visual depth
✔️ Clear background separation
✔️ Cinematic appearance
🔥 PRO Tip
💡 Key light → defines
💡 Fill light → softens
💡 Back light → separates
💡 Camera → captures the perfect balance